

How to Specify a Junior Bicycle Saddle for OEM and B2B Sourcing
For bicycle brands, product managers, sourcing teams and OEM/ODM buyers, the real difficulty is not finding a saddle that looks suitable in a catalogue. It is defining a saddle that fits the intended bicycle and rider range, meets the applicable requirements of the finished bicycle, can be quoted consistently by multiple suppliers, and can be reproduced after production begins.
A useful specification therefore connects five linked decisions:
bicycle application → rider range → saddle geometry → construction and CTQs → validation and production control.
The objective is not the most expensive saddle. It is a controlled product definition that suppliers can understand, quote, prototype, test and reproduce.
Quick Answer: What Should a Buyer Specify?
A junior bicycle saddle RFQ should normally define at least:
- Bicycle type and intended use
- Applicable market and regulatory requirements
- Maximum saddle height and relevant bicycle category
- Intended rider range
- Riding position and adjustment range
- Overall saddle length and width
- Defined measurement method for effective support width
- Shell construction
- Foam construction and acceptance criteria
- Cover material and durability requirements
- Rail material, geometry and mounting interface
- Critical-to-quality (CTQ) dimensions and tolerances
- Prototype and validation requirements
- Production testing and inspection
- MOQ and annual volume assumptions
- Tooling ownership and maintenance
- Golden-sample control
- Engineering-change requirements
Buyer decision rule: If two qualified suppliers cannot read the RFQ and understand essentially the same product, the specification is not yet ready for competitive quotation.
1. Start With the Bicycle, Rider Range and Applicable Requirements
Before specifying the saddle itself, define the bicycle program.
At minimum document:
- Bicycle type
- Intended use
- Wheel/frame range
- Maximum saddle height
- Intended rider size or mass range
- Riding posture
- Target market
- Expected annual volume
- Target price or BOM position
- Seat-post and clamp interface
The saddle cannot be evaluated independently from the bicycle on which it will be installed.
Maximum saddle height matters
The labels “junior,” “kids” or “children’s” do not by themselves determine which technical requirements apply.
ISO 8098:2023 specifies safety and performance requirements and test methods for fully assembled bicycles and sub-assemblies for young children. Its scope covers bicycles with a maximum saddle height greater than 435 mm and less than 635 mm. Bicycles with a maximum saddle height of 435 mm or less fall under applicable national ride-on-toy regulations; bicycles at 635 mm or more fall under the relevant ISO 4210 series.
Within the ISO 4210 framework, applicable requirements depend on bicycle category. ISO 4210-2:2023 covers, within its stated scope, young adult bicycles with a maximum saddle height of 635 mm or more and less than 750 mm, as well as city and trekking, mountain and racing bicycles meeting the standard’s criteria. ISO 4210-9:2023 provides the saddle and seat-post test methods for ISO 4210-2.
For the U.S. market, buyers must also consider applicable requirements under 16 CFR Part 1512. CPSC guidance addresses seat-post insertion marking, seat and seat-support protrusions, and seat/seat-post security under specified forces.
These requirements must not be reduced to a generic request for an “ISO-certified junior saddle.” The standards have defined product scopes and test methods. The buyer should establish the applicable requirements for the finished bicycle and its saddle/seat-post configuration before finalising any saddle test plan.
Buyer takeaway: Define the bicycle and market first. A saddle appropriate for one junior platform is not automatically appropriate for another simply because both use the same wheel size.
2. Define Junior Saddle Geometry Before Materials
Once the bicycle application is clear, define the geometry.
Primary parameters normally include:
- Overall length
- Maximum external width
- Effective support width
- Profile height
- Rear-platform shape
- Nose length and shape
- Shell contour
- Rail position, spacing and setback
- Mounting interface
- Relevant dimensional tolerances
Maximum width is not the same as effective support width
A saddle may have a large maximum external width without providing the intended support in the rider’s actual seating position.
Do not simply write on an OEM drawing:
“Saddle width: 150 mm.”
Instead define:
- Where the width is measured
- Whether the dimension refers to the cover, shell or another controlled feature
- The measurement plane or location
- Nominal dimension and tolerance
- Relationship to the intended support zone
“Effective support width” is a useful engineering parameter only when the buyer defines the measurement method. It is not a universally standardised industry dimension.
Buyer decision rule: If two suppliers can measure “saddle width” differently and both claim compliance, the drawing is incomplete.
3. Use Rider Data as an Input, Not a Universal Formula
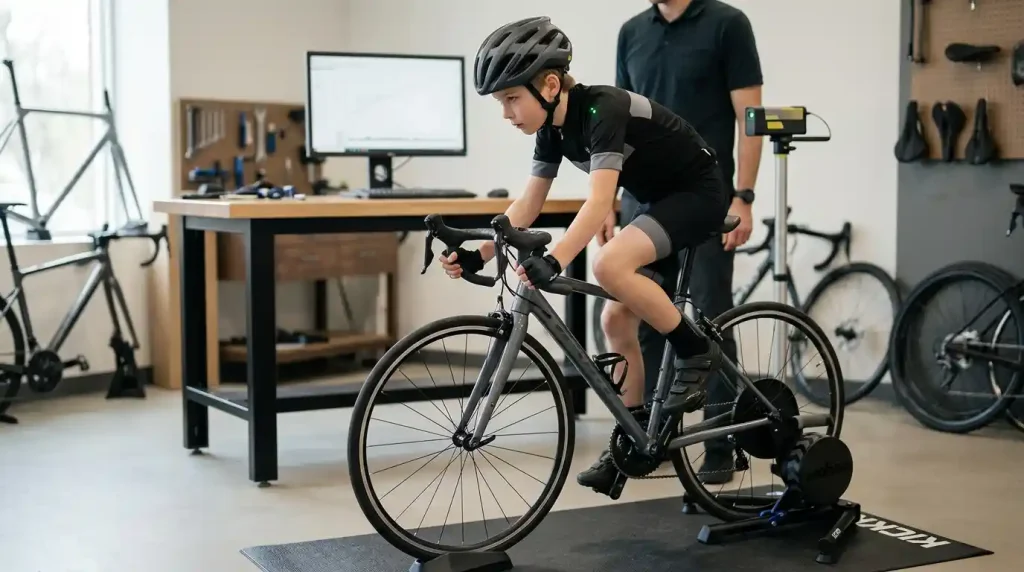
Children and young riders are still developing. A single saddle geometry may suit one rider band but not another.
Research on bicycle setup in children has shown that anthropometric characteristics, flexibility and perceived comfort influence suitable positioning. A study of 142 children aged 7–16 found strong relationships between anthropometric measures and some bicycle-setup variables, while other relationships were weaker. This supports treating rider data as an input to product development rather than assuming one universal fit formula.
Practical workflow:
Target rider band
↓
Bicycle geometry and saddle-height range
↓
Riding position
↓
Initial support-zone hypothesis
↓
Proposed saddle dimensions
↓
Prototype
↓
Representative rider or controlled validation
↓
Drawing revision
A rider measurement must not automatically become a fixed saddle dimension. Height and mass range information can establish an initial geometry hypothesis, but final width, length and profile must be validated against the actual bicycle configuration and intended riding position.
There is no defensible universal rule of the form “sit-bone width + X mm = correct junior saddle width” unless the specific method has been validated for the target population and application.
Practical prototype matrix
| Validation Group | Purpose |
|---|---|
| Lower end of target rider range | Check whether the platform is excessively large or difficult to position |
| Mid-range rider | Validate the primary design target |
| Upper end of target range | Check support area, adjustment range and usability |
| Different intended riding positions | Confirm geometry remains appropriate across the application |
This is a validation framework, not a universal testing standard. Exact sample size and method depend on product risk and target market.
4. Decide Whether One Saddle Platform Is Enough
A common OEM question is whether one junior saddle can cover the entire program.
A single platform is usually practical when:
- Rider range is relatively narrow
- Bicycle geometry is similar across SKUs
- Seat-post adjustment provides sufficient positioning range
- Support zone remains appropriate across the intended population
- Prototype validation confirms acceptable fit at both ends of the range
Multiple geometries become more appropriate when:
- Rider ranges differ substantially
- Bicycle categories use different riding positions
- Saddle-height or seat-post geometry changes significantly
- The same saddle creates poor support at one end of the range
- The brand maintains distinct product tiers or platforms
Buyer decision rule: Do not create multiple saddle SKUs merely because the bicycles have different wheel sizes. Conversely, do not force one platform across a broad rider range without prototype evidence. The correct decision rests on rider range + bicycle geometry + adjustment range + validation results.
5. Turn the Geometry into a Controlled Specification
Once the design hypothesis is established, convert it into measurable requirements.
Junior Saddle Specification Matrix
| Parameter | Buyer Specification | Type | Why It Matters |
|---|---|---|---|
| Bicycle application | Type, frame/wheel range, intended use | Context | Establishes design and compliance basis |
| Rider range | Target size/mass band | Context | Defines loading and fit assumptions |
| Overall length | Nominal + tolerance | CTQ | Controls fit and usable adjustment |
| External width | Defined measurement location + tolerance | CTQ | Controls physical envelope |
| Effective support width | Defined method/location + tolerance | CTQ | Controls intended support geometry |
| Profile | Defined reference points + tolerance | CTQ | Controls seating position |
| Shell | Material, construction, relevant stiffness/flex zones | CTQ | Controls geometry and durability |
| Foam | Construction + validated performance criteria | CTQ | Controls support and compression behaviour |
| Cover | Material + seam/attachment requirements | CTQ | Controls durability and appearance |
| Rails | Material, diameter, spacing, position, retention | CTQ | Controls compatibility and security |
| Mounting interface | Seat-post/clamp compatibility | CTQ | Prevents installation problems |
| Branding | Logo method, position, artwork | Cosmetic / CTQ | Controls appearance and tooling |
| Packaging | Method and protection requirements | Commercial/Quality | Controls transit damage |
| Applicable requirements | Market and bicycle-specific requirements | CTQ | Establishes compliance basis |
| Annual volume | Forecast range | Commercial | Supports capacity and price evaluation |
| MOQ | By model, colour, material | Commercial | Determines inventory exposure |
| Tooling | Cost, ownership, maintenance, transfer terms | Commercial/Risk | Protects the program |
| Change control | Notification and approval requirements | CTQ/Commercial | Protects production consistency |
Not every requirement deserves the same inspection intensity. Rail position and effective support width affect function; cover colour is usually cosmetic. CTQ classification focuses controls where field problems are most likely.
Buyer takeaway: A specification becomes useful when every critical requirement has a measurement method, tolerance or acceptance criterion.
6. Specify Shell, Foam, Cover and Rails by Function
A material name alone rarely defines performance.
Shell
Injection-moulded polymer shells are a practical choice for many volume junior programs because they deliver repeatable geometry and integrate efficiently with production tooling. Evaluate material, structural design, thickness where relevant, flex behaviour, rail attachment, dimensional stability, tooling requirements and production consistency. Premium constructions should be justified against a measurable product objective (weight target, positioning, etc.), not adopted by default.
Foam
“High-density foam” is not an engineering specification. Define construction, relevant density range, thickness, zonal design if used, compression behaviour, recovery, permanent set, temperature sensitivity and attachment method.
A better formulation is:
Foam construction + dimensional requirement + performance test + acceptance criterion.
Example acceptance framework (limits must be established for the specific design):
- Specified specimen or finished-saddle location
- Controlled compressive load
- Defined loading duration
- Defined recovery period
- Pre- and post-test thickness measurement
- Maximum permitted permanent thickness loss
Suppliers can then be compared using the same method.
Cover
Evaluate for the actual use environment: abrasion resistance, UV exposure, water exposure, seam durability, surface grip, cleanability, colour stability and bonding/stapling consistency. Define the test method before production approval.
Rails
Steel and chromoly are common in cost-sensitive programs; titanium or composite rails may be justified by weight or positioning objectives. Specify material, diameter, geometry, spacing, fore-aft position, attachment method, retention requirements and compatibility with the chosen seat-post/clamp. Rail position also determines usable adjustment range on the bicycle.
Buyer takeaway: Specify materials by the function they must perform, then validate that function. Material names are not substitutes for performance requirements.
7. Build the Test Plan Before Tooling
Testing must be defined during development, not after tooling is complete.
Structure: Requirement → Method → Sample → Acceptance → Test Owner → Frequency → Record
| Test Area | Method / Reference | Sample | Acceptance | Owner | Timing |
|---|---|---|---|---|---|
| Structural / security | Applicable standard or agreed method | Prototype + pilot | Pass applicable requirement | Qualified lab / supplier / buyer | Development + production control |
| Rail retention | Applicable or agreed force/direction | Prototype + pilot | No unacceptable separation/movement | Agreed test owner | Development + periodic |
| Dimensions | Controlled drawing | Production samples | CTQs within tolerance | Supplier QC | Defined production frequency |
| Foam compression/recovery | Defined internal method | Prototype samples | Within approved performance range | Supplier / buyer | Development |
| Cover durability | Material-appropriate method | Prototype samples | Within approved limit | Supplier / third party | Development |
| Installation | Approved bicycle / seat-post interface | Prototype + pilot | Correct installation and adjustment | Engineering / QC | Development + pilot |
| Appearance | Golden sample | Production samples | Within visual standard | QC | Production |
| Change validation | Engineering-change procedure | Changed component/process | Re-test if risk assessment requires | Buyer + supplier | Ongoing |
Internal durability tests do not replace required regulatory or standards-based tests. ISO 4210-9:2023 provides saddle and seat-post test methods for ISO 4210-2. Applicable 16 CFR Part 1512 provisions must be evaluated against the actual regulatory text.
Buyer decision rule: Every critical test must have a defined method and acceptance criterion before the result is needed. “Acceptable deformation” is not an acceptance criterion until “acceptable” has been defined.
8. Use Failure Modes to Strengthen the Specification
Work backward from potential failures:
| Potential Failure | Possible Cause | Specification / Control |
|---|---|---|
| Saddle difficult to position | Rail position or setback variation | Controlled rail geometry |
| Saddle shifts during use | Clamp/rail interface or retention problem | Installation and retention testing |
| Foam height varies between lots | Foam process variation | Controlled thickness / profile CTQ |
| Cover wrinkles or separates | Inconsistent tension or attachment | Visual standard + attachment process control + durability test |
| Saddle profile changes | Shell / foam dimensional variation | Controlled profile and thickness measurements |
| Product differs from approved sample | Material or process change | Formal change control |
| Second supplier produces different geometry | Ambiguous drawing | Controlled dimensions and measurement methods |
| New tooling produces different fit | Geometry not adequately controlled | Drawing + golden sample + validation |
| Transit damage | Insufficient packaging protection | Packaging specification and inspection |
A good specification anticipates how the product can fail and builds controls before those failures reach the market.
9. Choose Catalogue, ODM or Full OEM Deliberately
Not every junior saddle project requires a new mould.
- Catalogue / private-label — existing platform already fits; only branding or colour changes needed; volume or market uncertainty high; speed prioritised.
- ODM modification — supplier has a proven platform; moderate geometry or material changes required; development time or tooling complexity to be limited.
- Full OEM — new geometry required; brand needs differentiated fit or appearance; existing platforms cannot meet requirements; controlled tooling and proprietary specifications needed.
Buyer decision rule: Use the least complex development route that meets the product requirement. A custom mould is not automatically evidence of a better product.
10. Qualify Suppliers Before Comparing Prices
Catalogues and photographs are useful for initial screening; they are not evidence of production capability.
Request evidence appropriate to the project:
| Evidence | What to Check |
|---|---|
| Engineering drawings | Can the supplier work from controlled specifications? |
| Material documentation | Can critical materials be identified and controlled? |
| Test reports | Are method, sample and result clearly identified? |
| Dimensional inspection | Can CTQs be measured and recorded? |
| Process controls | Are critical manufacturing steps controlled? |
| Tooling records | Are ownership and maintenance responsibilities documented? |
| Sample control | Can approved samples be retained and referenced? |
| Change control | Will material / process / supplier changes be communicated? |
| Traceability | Can production lots be linked to inspection / material records? |
| Corrective action | Can nonconformities be investigated and documented? |
| Production capacity | Can required volume be supported? |
| MOQ flexibility | Does MOQ fit the buyer’s SKU strategy? |
An ISO 9001 certificate (where applicable) evidences a quality-management framework. It does not by itself prove that a supplier can manufacture a specific saddle to a buyer’s drawing.
11. Use Qualification Gates Before a Scorecard
A weighted scorecard is useful only after critical risks have been eliminated.
Gate 1 — Compliance
Can the supplier support the applicable market and product requirements?
Gate 2 — Engineering
Can the supplier understand and control the required geometry, materials and CTQs?
Gate 3 — Production
Can the supplier reproduce the approved design consistently?
Gate 4 — Commercial
Are MOQ, tooling, price, lead time and payment terms commercially workable?
Only suppliers that pass the gates proceed to detailed commercial scoring. An illustrative scorecard might weight engineering and quality at 20 % each, testing 15 %, tooling 10 %, MOQ flexibility 10 %, commercial competitiveness 15 %, lead time 5 % and change-control discipline 5 %. These percentages are a buyer model, not an industry standard; weighting must be adjusted to the program.
Buyer takeaway: Use pass/fail gates for critical risks, then weighted scoring for trade-offs. This prevents a low unit price from compensating for weak engineering or quality control.
12. Compare Suppliers on Total Program Cost
Normalise quotations before comparison. At minimum examine:
- Unit price at target volume and at lower volume
- MOQ
- Tooling cost, ownership and maintenance
- Sample cost and lead time
- Mass-production lead time
- Testing cost
- Packaging and branding setup
- Payment terms and quotation validity
- Technical deviations
- Change-control commitments
Useful commercial model:
Effective program cost = product cost + tooling cost + testing cost + MOQ / inventory exposure + quality risk + lead-time risk + future change cost.
Hypothetical example — not an industry benchmark
Supplier A: $8.00 per saddle, $4,000 tooling, MOQ 2,000.
Supplier B: $8.30 per saddle, $2,000 tooling, MOQ 500.
If the buyer initially needs only 600 units, Supplier A’s lower unit price does not automatically make it the lower-cost option. The correct comparison depends on actual forecast, tooling ownership, inventory carrying cost, testing requirements and expected repeat orders. The numbers above are illustrative only and must not be treated as typical market pricing.
Buyer decision rule: Never use a quoted unit price as the sole selection criterion when MOQ, tooling and quality risk differ materially.
13. Treat Tooling as a Commercial and Product Risk
For a custom saddle, tooling affects both cost and product control. Before development begins, clarify:
- Who pays for the tooling
- Who legally owns it
- Who maintains and repairs it
- Who approves modifications
- Whether the tooling can be used for another customer
- What happens if the supplier changes
- Whether and how the tooling can be transferred
- How tooling condition will be documented
- What happens when the program ends
Paying for a mould does not automatically answer these questions. Ownership, access, maintenance, transfer and end-of-program arrangements must be written into the commercial agreement.
Tooling decision rule: If the geometry is strategically important to the brand, tooling ownership and transfer rights are part of product risk management, not merely a line on the quotation.
14. Write the RFQ So Two Suppliers Quote the Same Product
A weak RFQ leaves too many assumptions:
“Please quote a black OEM junior bicycle saddle for a 20-inch bike.”
A stronger RFQ contains five clear sections:
Product definition — bicycle type, rider range, intended use, target market, bicycle geometry, seat-post interface.
Geometry — overall length, external width, effective support width (with measurement method), profile, rail position and spacing, mounting interface, tolerances.
Construction — shell, foam, cover, rails, attachment/bonding method.
Quality and testing — CTQs, dimensional tolerances, appearance standard, material requirements, test methods, acceptance criteria.
Commercial requirements — annual forecast, MOQ, tooling, tooling ownership, sample cost, lead time, packaging, branding, payment terms, quotation validity, deviations.
Change control — material, supplier, process and tooling changes; approval and re-testing requirements.
Require suppliers to list every deviation from the specification. This prevents a supplier from silently quoting a different product and winning on price.
15. Prototype, Golden Sample and Pilot Production Are Different Gates
Prototype answers: Can the design work?
Check geometry, installation, rider position, appearance, construction and preliminary functional performance.
Golden sample answers: What exact product configuration has been approved?
It must represent geometry, dimensions, shell, foam, cover, rails, colour, logo, appearance and relevant packaging, and must be linked to the approved drawing and specification revision.
Pilot production answers: Can the supplier reproduce the approved product consistently?
A good-looking prototype does not prove production capability.
Buyer decision rule: Prototype approval proves design intent; pilot approval proves production reproducibility.
16. Control Changes After Production Release
A saddle that meets the original specification can still become a different product if critical components or processes change (foam supplier or formulation, shell resin, cover material, adhesive, rail supplier, tooling, process or critical equipment).
Before production begins, define:
- Which changes require notification
- Which changes require buyer approval
- What evidence the supplier must provide
- Whether re-testing is required
- Whether the golden sample must be replaced
- When the changed product may enter production
The objective is not to block every manufacturing improvement; it is to prevent uncontrolled change from becoming a quality problem.
17. Practical Junior Saddle Development Workflow
- Define the bicycle (type, intended use, wheel/frame range, maximum saddle height, seat-post interface).
- Confirm applicable requirements (target market + bicycle category + standards/regulations).
- Define the rider range (size/mass band, riding position, adjustment assumptions).
- Establish the geometry hypothesis (width, length, profile, rail position, support zone).
- Build the controlled specification (materials, CTQs, tolerances, acceptance criteria).
- Decide Catalogue vs ODM vs OEM (least complex route that meets the requirement).
- Qualify suppliers (Compliance → Engineering → Production → Commercial gates).
- Issue the RFQ (identical technical target to every qualified supplier).
- Normalise quotations (price, MOQ, tooling, testing, lead time, risk).
- Prototype (geometry, installation, function).
- Test (applicable regulatory/standards tests + program-specific validation).
- Approve the golden sample (freeze the production reference).
- Pilot production (verify repeatability and process control).
- Release production (approved supplier + controlled specification).
- Control changes (defined review and approval for relevant material, supplier, tooling or process changes).
This sequence is more reliable than selecting a catalogue saddle first and forcing the specification to fit afterward.
18. What a Strong Junior Saddle Specification Looks Like
A specification is strong when it can answer six questions without relying on supplier assumptions:
- What is the product? (Bicycle application, rider range, geometry, construction.)
- What must not change? (CTQs, dimensions, materials, interfaces, critical processes.)
- How is it measured? (Defined measurement methods and tolerances.)
- How is it tested? (Method, sample, acceptance criterion, test owner.)
- What must the supplier prove? (Engineering capability, quality controls, testing, production consistency, traceability.)
- What happens when something changes? (Defined notification, approval and re-validation process.)
If two qualified suppliers can answer those questions in essentially the same way, the RFQ is doing its job.
19. Buyer Checklist Before Approving a Junior Saddle Supplier
Confirm that you have:
- Defined bicycle type and intended use
- Confirmed maximum saddle height and applicable requirements
- Defined target market
- Defined intended rider range
- Defined riding position and adjustment assumptions
- Defined overall dimensions and measurement methods
- Defined effective support width
- Approved shell, foam, cover and rail construction
- Defined seat-post / clamp compatibility
- Identified CTQs and tolerances
- Defined applicable tests, acceptance criteria and test ownership
- Qualified suppliers against evidence
- Compared quotations on total program cost
- Defined MOQ assumptions
- Defined tooling ownership and maintenance
- Approved prototype samples
- Completed required testing
- Controlled the golden sample
- Completed pilot-production validation
- Defined production inspection
- Established engineering-change control
20. Final Perspective
The objective of junior saddle sourcing is not to find the smallest saddle, the softest foam or the lowest quoted price. It is to create a product definition that connects:
rider → bicycle → geometry → materials → CTQs → testing → supplier capability → production control.
Commercial risk often appears after the quotation stage: an attractive prototype that cannot be reproduced, a low unit price paired with an unworkable MOQ, a paid-for mould that is poorly protected contractually, or a material change that quietly alters profile or durability.
A controlled specification reduces those risks before they become production problems.
For brands and OEM/ODM buyers the practical goal is therefore clear: define the product clearly enough that qualified suppliers can quote the same target, validate the same requirements, reproduce the same approved configuration, and control relevant changes throughout the production life of the program.
Manufacturers that can support controlled drawings, product-specific testing, golden-sample retention, traceable inspection and formal engineering-change control are better positioned to support repeatable junior bicycle programs.
Standards and Regulatory References
- ISO 8098:2023 — Cycles — Safety requirements for bicycles for young children. Scope: fully assembled bicycles and sub-assemblies for young children with a maximum saddle height greater than 435 mm and less than 635 mm.
- ISO 4210-2:2023 — Cycles — Safety requirements for bicycles — Part 2. Covers the stated city/trekking, young adult, mountain and racing bicycle categories within its scope.
- ISO 4210-9:2023 — Cycles — Safety requirements for bicycles — Part 9: Saddles and seat-post test methods. Provides test methods for ISO 4210-2.
- U.S. CPSC bicycle requirements / 16 CFR Part 1512. Includes seat-post insertion marking, seat/seat-support protrusion requirements and seat/seat-post security requirements.
Important: Standards and regulations must be checked against the current edition and the exact bicycle configuration and target market before commercial release. The references above are not a substitute for a product-specific compliance assessment.